Total Pageviews

Friday, 6 February 2015

Detail | Design Development

[Page from sketchbook]

Using the final work on the mannequin, I created a series of collaged sketches. This helped me work out proportions and also the various designs that could be made from this stand work. This was extremely useful as it helped me realise that I liked the stand work jacket to be a long length oversized coat. If I were to make an official garment it would need to be in a high strength fabric too, meaning it could hold its shape. The buttons and details although worked well on a small scale in design would be quite unrealistic on the scale I wanted. However, with the right machine and fabrication either oversized, or undersized buttons would work well. As my toile was a 360* view it meant I could design the garment all ways, changing bits as I desired. 

Using old designs and collage, I added details onto my photographs like extra frilling or buttons, this gave new ideas on what embellishments could be added for extra detailing.

The bottom three designs were the basis for my final designs. Instead of drawing a line up, for my final designs I decided to keep in theme with the collage designing and use previous mannequin work and edit it on photoshop to create the look I wanted. 


Thursday, 5 February 2015

Detail | Mannequin Drawings

[Pages from sketchbook]


As well as placing the pleated paper onto the mannequin, I also made some seam designs; using a clean strip of paper I came up with a few basic shapes of where collar lines and openings could go on a garment. Making these helped me start up my designs, I was having a little trouble transitioning from initial concept to physical designs. The seams were extremely useful as they helped me lift my designs to a realistic idea of how a garment would fit onto the body. Using collage of some of the mannequin work to create designs also helped me think of new ways of using each detail.

From this point I will use these drawings and collages to create a rough toile of what I could create for my final. Due to time constraint I might leave the toile as a 'semi' final piece and create a line up based on this mannequin work and development. I love the idea of tiny buttons placed around the garment holding together layers upon layers of material. Using this I will create my toile and work from that.

Wednesday, 4 February 2015

Detail | Mannequin Work


After picking out and selecting various collars and details I decided to take them to the mannequin and start applying them in paper form on different bits of the body. As it was only possible to do sections of the details; sleeves, collars, cuffs etc I decided to add on where I could place fastenings in the paper work afterwards. I decided to focus on the collars and detailed layered of edwardian clothing, I used brown paper as it has much more structure meaning It would hold if I put it in obscure places.

As well as this, I photocopied the paper pleat and collaged it onto some sketches, moving around the pleats in areas it could be used and adding fastenings onto my drawings. I kept the colour minimal, adding small amounts of watercolour for extra detail.

This was really useful as it brought my ideas forward, taking the details I was studying and being able to make them into something new. Through moving them around and creating new shapes and ideas on a mannequin it meant I could process how to take these and turn them into more designs. From this stage I have started doing some rough designs.


Tuesday, 3 February 2015

Detail | Idea Development

[Water-colour detail sketches based on dresses from 1901-17]

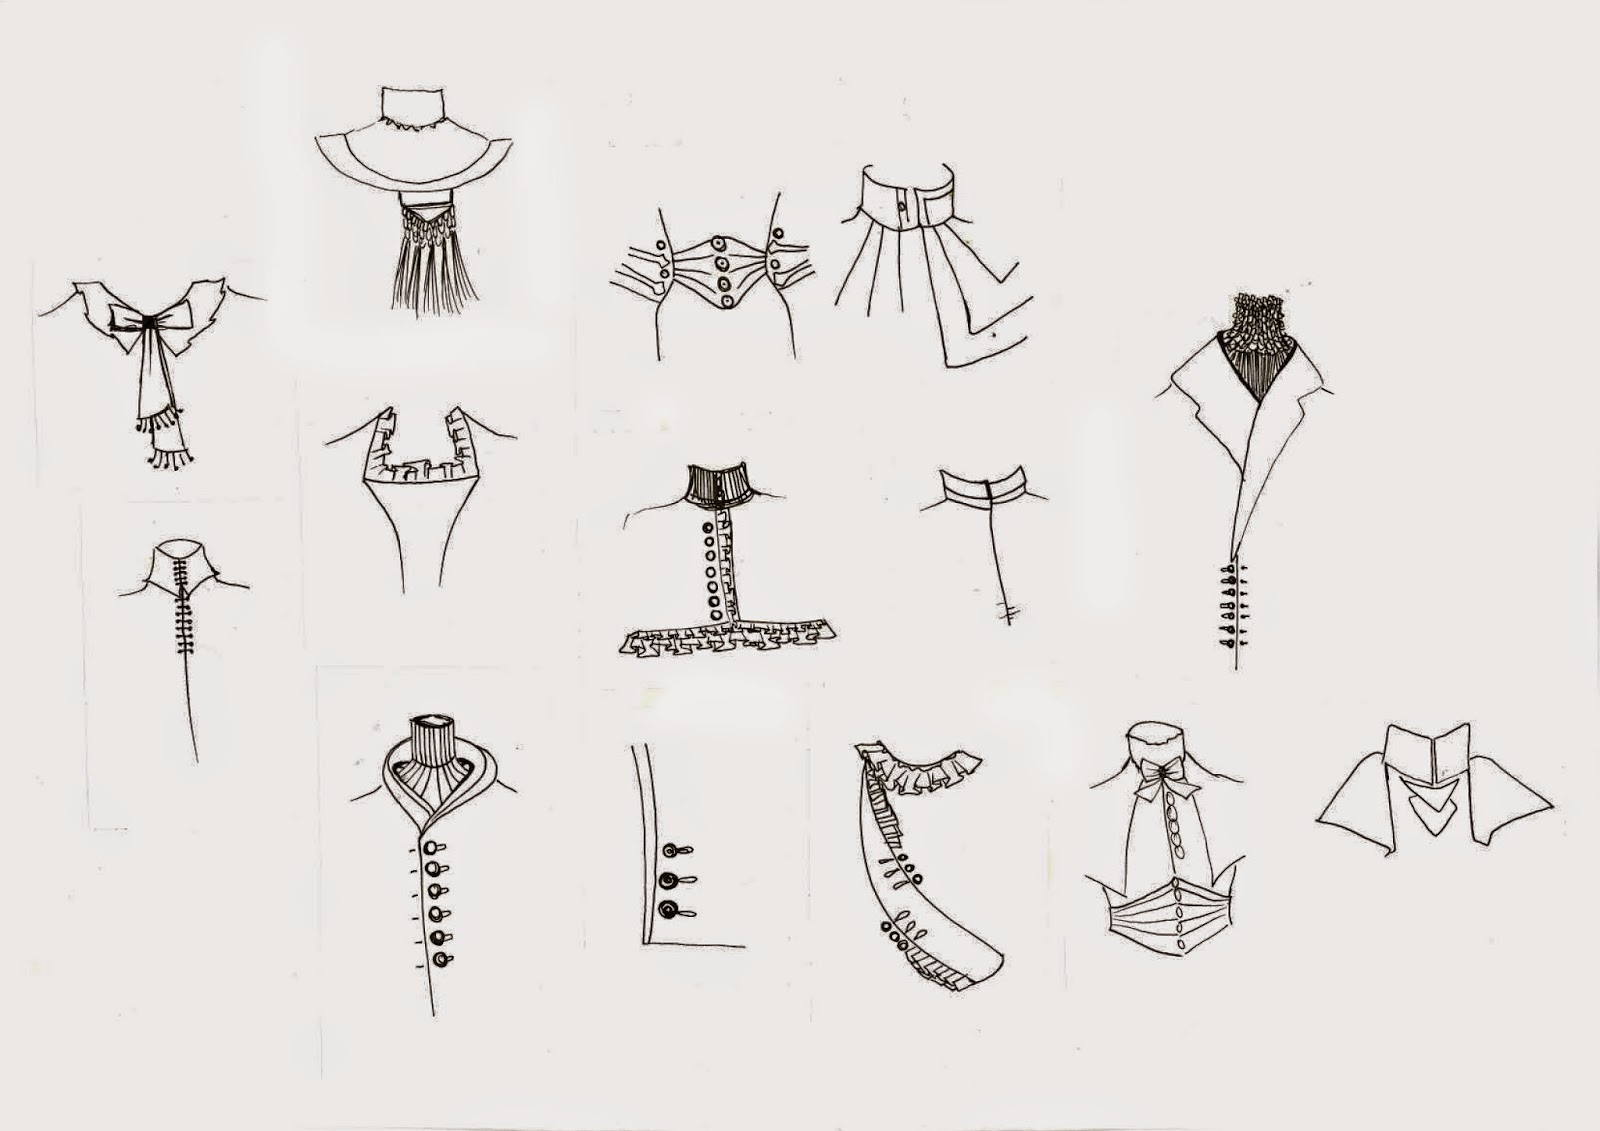
Today I decided to pick out the main details repeated throughout Edwardian dresses, and line them in pen and shade in water-colour. This brought out the delicacy of each detail and inspired me to turn these into some sort of design; textile or development. The shape and silhouette of the dresses remained very similar throughout the entire period, but the details alter dependent on what the dress was for and who would wear it. Similar detailing was used across dresses, this was interesting as the difference between day and evening wear wasn't in shape, length or silhouette. The main differences was the cut of the shoulders and collar, and the detailing on both of these. 

Most dresses included some sort of lace, whether in the form of a collar detailing, skirt trim or simple add-on's to sleeves and shoulders. The embroidery on some of the dresses was intricate, one dress included gold thread all over made to look like layers upon layers of peacock feathers. The dress supposedly 'lit up' when entered the room. Each part of the embroidery was made by hand, and the dress would only have been worn but the richest aristocracy at the finest balls. 

One detail I kept picking out was the incredible amount of layering, every dress had a huge amount of layers, petticoats, skirts, aprons, added lace, frills, jackets, bodices and coats. This could have been due to how cold houses were, or simply to show how much a person could afford simply through the amount of material they wore. 

The colours I picked for the water-colour were mainly based on how I associate wealth with colour. Dyes in that period would have been very expensive, meaning the darker richer colours would only be worn by the wealthiest. Seeing as I am focusing this project on the rich people of the Edwardian Period, I used blues, purples and reds to colour my sketches. I hope to include maybe a gold or white, perhaps in the form of a lace or laser cutting as a physical response.

As I wanted to use these drawings to further my development, I photocopied (enlarging and duplicating) a few of the sketches. With these I can turn them into textiles like prints or embroidery, or simply cut and paste them onto a body to rearrange where each detailing could go. As I only did a few, I feel I need to step my game up and produce at least three times this amount. On top of this, this weekend I shall start to try to recreate some of these on a mannequin. This will help me understand the fabrication methods, and also physically alter where each detail could be placed. I will record this process and start some designing from there. I think I also need a little more research on fabrication, but a trip to the V&A tomorrow should provide a good basis. 


Thursday, 29 January 2015

Detail | V&A

 [Various Edwardian Dresses displayed at the V&A]

[Lace Details]
[lace detailing in fashion with some samples I collected]


The trip to the V&A wasn't as helpful as I thought it would be, mainly because there is a minimal section on the Edwardian Period. However I took images throughout, mainly on detailing around the period. There was a small Section near the Wedding Dresses Exhibition that had period clothing from 1901 to 1920, I noticed the use of lace as a textile across the era, but in particular the main identifiable detailing was cuffs, high collars, large lapels, miniature buttons in lines as fastenings and cravats. The coats of the era were full length normally with buttons the whole way down. The dresses remained long, but lost the large skirts of the Victorian period. 

The Coat-
'These include the reverse collar and lapels, where the outer edge of the lapel is cut from a separate piece of cloth from the main body, and also a high degree of waist suppression, where the coat's diameter round the waist is much less than round the chest. This is achieved by a high horizontal waist seam with side bodies, which are extra panels of fabric above the waist used to pull in the naturally cylindrical drape.'

Something I liked about the dresses was the amount of layers they had, in certain skirts the skirt had 3 or 4 separate layers. I presume this was for warmth as the houses were probably really cold. Most separate pieces were matching; for example the skirts matched the tops, both matching the coat. The most amount of detail was on the collars and chest area, in particular ribbons and laces were used. Much of the detailing was repeated across a garment. For example if small buttons were used as a fastening down the top (collar to bottom) it would also be used on the sleeves and maybe on the hem of the dress or skirt. The tall, stiff collars characterised the period, usually high boned. The decline of the popularity of the bustle meant sleeves increased in size and the 1830's silhouette became popular again; the hourglass. That of a confident woman, low full chest and curvy hips. Blouses and dresses were full in front and puffed ion a "pigeon breast" and the waist was accented with a sash or belt. Dresses had trains, even during the day. But by the end of the period the skirts were barely touching the floor and were closer to the ankle. 


Wednesday, 28 January 2015

Detail | Mood Boards

[Pages from sketchbook]


I started making a few mood boards from various early 20th Century books I found in the library, in particular one named 'Details through time' which the sketched images are from. This book was extremely helpful as it labelled each parts of the  clothing at exact timing. Even over the Edwardian Period the physical details on the dresses was slightly altered. Taking these details, I will experiment different ways of reproducing them.

I think I've greatly improved how I mood board, selecting relevant images only and also including my responses to brighten up the boards and highlight which parts are most important. Sometimes these responses actually help me jump from board to idea development. 


Tuesday, 27 January 2015

Detail | New Project

Today we started a new project, the outcome is to produce a collection of work based on the extreme intricate details taken from an era over the past 300 years; 1640-1940 to be precise. We could pick any era we liked, and any section of the era within that. As I have very little knowledge of history, i decided to visit the library and root through various 'Fashion through ages' books until I came across an era I found particularly interesting.

The aim is to understand the detailing of the clothes from a particular era, to improve my basic designs skill and process. Fashion designers often use this method, borrowing ideas from a wider variety of historical periods. For example Mcqueen using paintings by Bosch, Botticelli and others embroider into his final collection. Different era's had very obvious detailing on each pieces; ranging from the minuscule waist sizes in victorian dresses to the head to toe buttoning on edwardian to the denim stitching in american workwear. One aspect I will look into is how the rich dressed, the gowns in the past centuries were extremely extravagant, both in detailing and colours. Materials were outrageously expensive, so the fabrication and cleaning process had to be taken into account.

The period I am going to research and base my project on is very early 1900's, The Edwardians. The clothes of the rich were flowing gowns, long coats, many buttons and fastenings, but in particular lace. The dresses of the rich women, the aristocracy, had many removable parts. From sleeves to lace shoe spats. As I aim to modernise this time into a full collection, I will try to take the most iconic details and focus on them. The collection must be daywear and therefore doesn't need to take the gown shape or flowing skirts. However, this big skirt silhouette could be translated into a more modern idea, using length and a number of layers.