As previously mentioned, my pattern cutting knowledge is severely lacking, so I sought help from Declan, a previous Ravensbourne Student who also had a Btec in Pattern Making. I showed Declan my final designs and he helped me create them onto pattern cutting paper. I was really worried about the actual making of the garment so Declan's help was extremely useful and took a huge stress off. In future, I really hope to be able to pattern cut to his standard as he was so talented and a great inspiration to me.

I decided to make a toile first so that I could make sure I liked everything and that it was how I had envisioned it.

My first challenge was the sleeves, as inspired by a kimono they had to be oversized, but to relate to structure the calico wasn't strong enough so I had to starch it. Although I knew I would be using a stronger fabric than calico, the starch gave me a better idea of how the fabric would hold against the body and more of a feel of what it would look like. My next immediate challenge was attaching the sleeves to the body. I had no idea how to do this, so it was quite a lot of trial and error. Fortunately I worked it out and attached both sleeves, but in my stress I accidentally didn't turn one sleeve the right side out so the seam showed. Through making a mistake like this, it taught me that I need to be more careful for the final product, and which way to sew the fabric together.
The first problem I encountered with the pattern was the size of the sleeves against the hole in the main body, however this was extremely easy to fix. I simply added 2cm to each side of the sleeve to ensure there was no tightening of the sleeve in the final. My other alteration I decided on was the neckline. I wanted the neck be high enough that it sat just under the eyes. So using my toile and some pattern making paper, I played around with height until I got the desired effect. I decided to curve it round instead of having the neck as the same height front and back, with an extra 12cm on top, 6cm on each side and 3cm extra at the back.

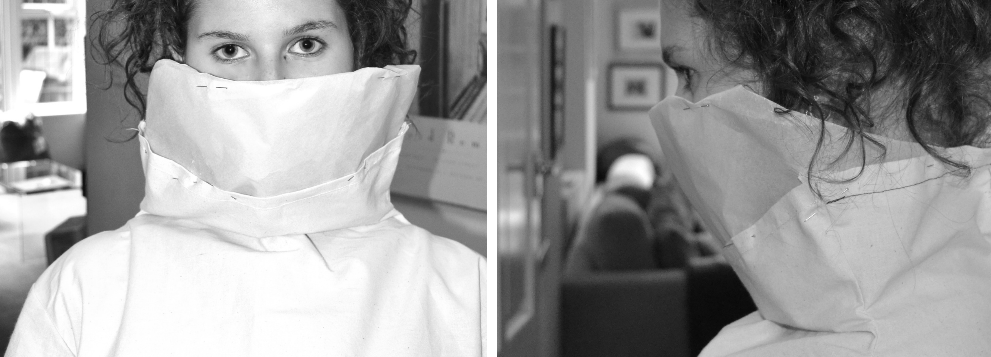
Finally, to incorporate what I saw at the V&A, in both the Asia sections, Horst and the Wedding Dress Exhibitions, the immediate response was an armor embellishment, like those seen in the Samurai section in the Japanese exhibit, but also with the structure of Blow's hat, and the avant garde nature of Horst's photographic style. This is where my paper work came into play, I used my paper from my mannequin work to place in various places around my coat, but finally decided upon one shoulder, which can be seen in the first two pictures.

I am extremely excited to see how this works in my fabric, which I have now chosen. It is, of course, red, bringing the Autumnal colour palette into play. As I need structure in the garment, the fabric had to be strong, I narrowed my fabrics down to three; burgundy wool lined with interfacing, burgundy patterned faux leather and red faux leather. I decided the faux leather was more striking, and I decided on the brighter red purely for the shock factor, much like the red wedding dress.
No comments:
Post a Comment